How to build and deploy container images in Azure
How to build and deploy container images in the Azure
ACR (Azure Container Registry) Tasks is a suite of features within Azure Container Registry that provides streamlined and efficient Docker container image builds in Azure. In this article, I used the quick task feature of ACR Tasks.
For this task, i will be working in the Azure CLI
-
Clone the GitHub original repository or the forked one using the “git clone” command
-
Change the working directory to the folder of the cloned repository
-
Set the environment variable for the registry name which will also be used for other resources in this task.
(note that the registry name must be unique within azure and can only contain between 5-50 lowercase alphanumeric characters.)
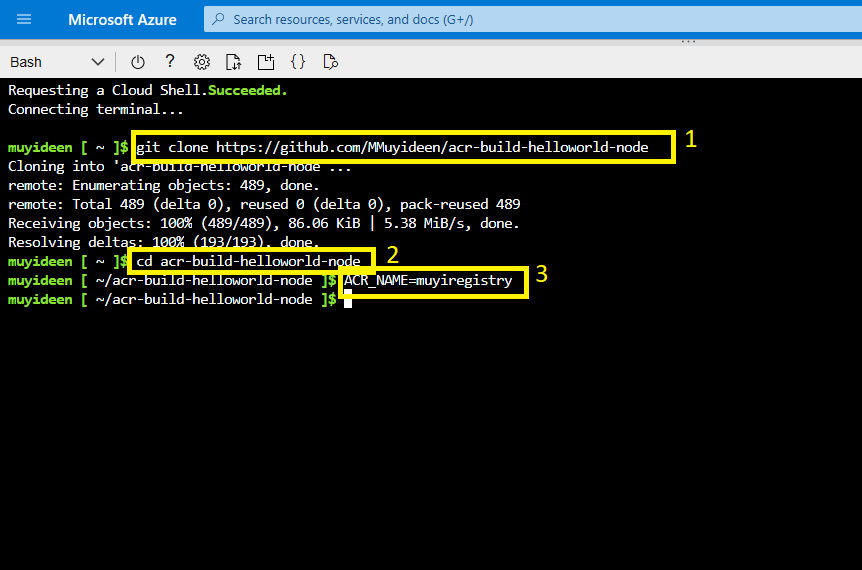
The original GitHub repository to be forked for this task can be found here
-
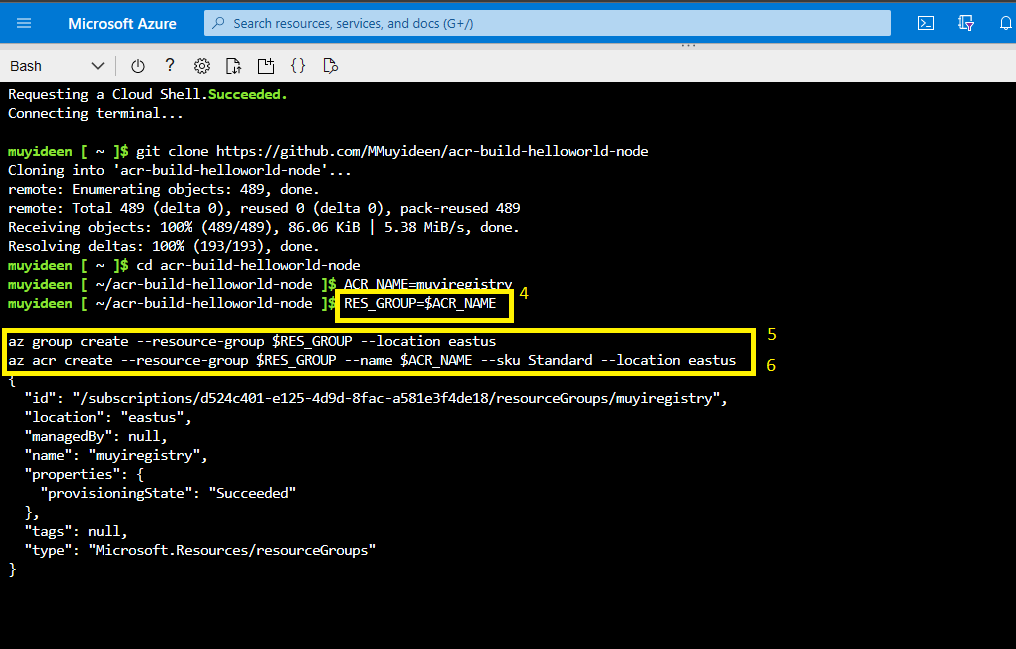
Set the name of the resource group to be created as the acr name
-
Create the resource group where the resources will be grouped
-
Create the acr using the command as shown in the image
-
Use ACR Tasks to build a container image from the sample code. Execute the
az acr buildcommand to perform a quick task.From the output from the
az acr buildcommand. You can see the upload of the source code to Azure, and the details of thedocker buildoperation that the ACR task runs in the cloud.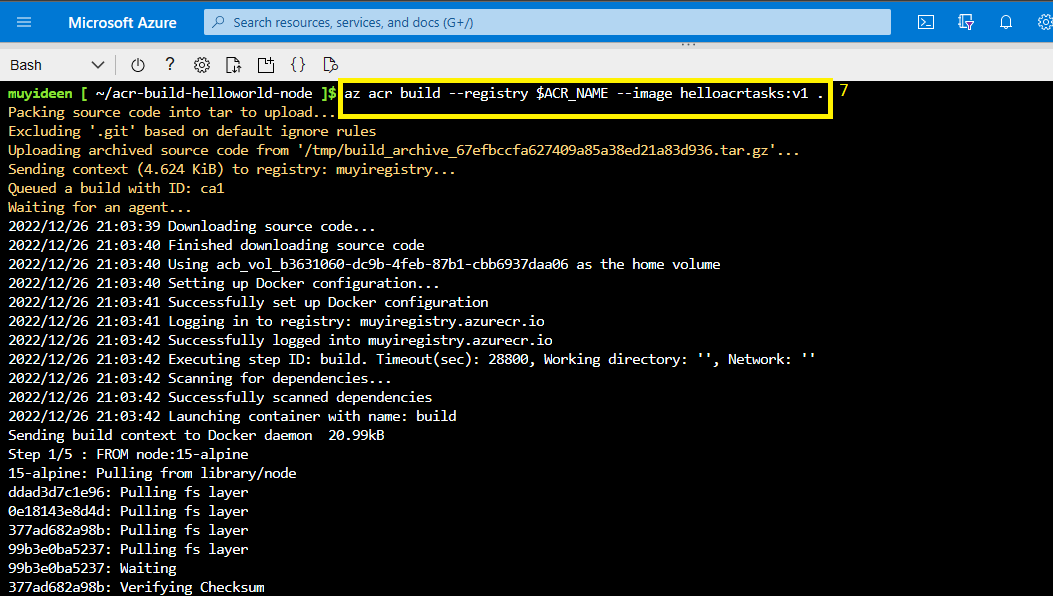
Deploy to Azure Container Instances#
ACR tasks automatically push successfully built images into the registry by default, allowing immediate deployment from the registry.
-
create a key vault to store credentials
-
add vault to the acr variable to use as a name for the key vault
-
create the key vault using the az keyvault create command
AKV_NAME=$ACR_NAME-vault az keyvault create --resource-group $RES_GROUP --name $AKV_NAME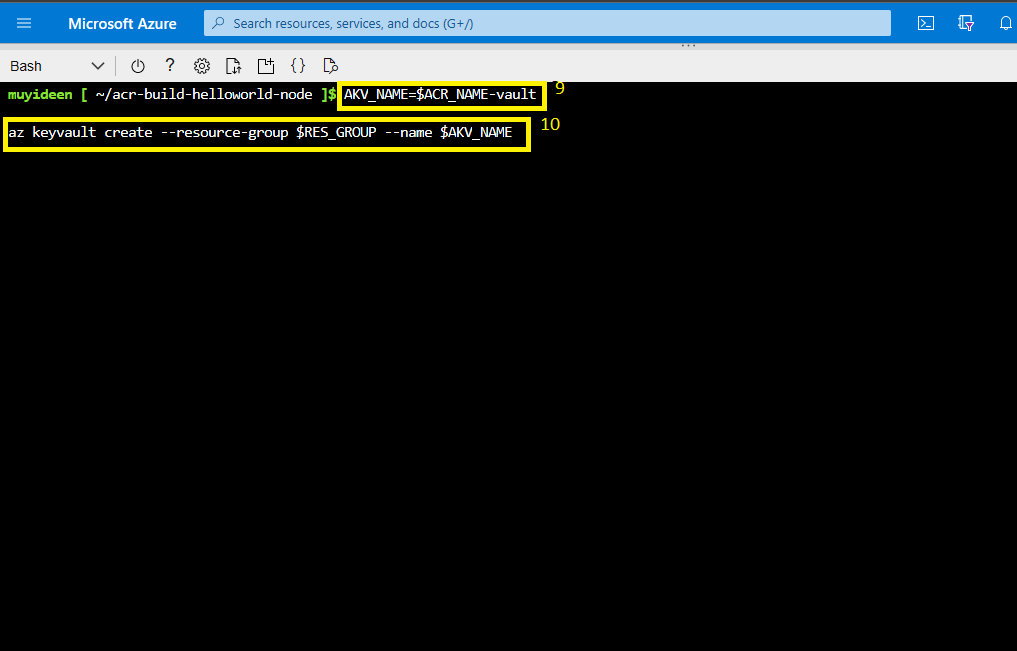
Create a service principal and store credentials
You now need to create a service principal and store its credentials in your key vault.
-
Use the
az ad sp create-for-rbaccommand to create the service principal, andaz keyvault secret setto store the service principal’s password in the vault.# Create service principal, store its password in AKV (the registry *password*) az keyvault secret set \ --vault-name $AKV_NAME \ --name $ACR_NAME-pull-pwd \ --value $(az ad sp create-for-rbac \ --name $ACR_NAME-pull \ --scopes $(az acr show --name $ACR_NAME --query id --output tsv) \ --role acrpull \ --query password \ --output tsv)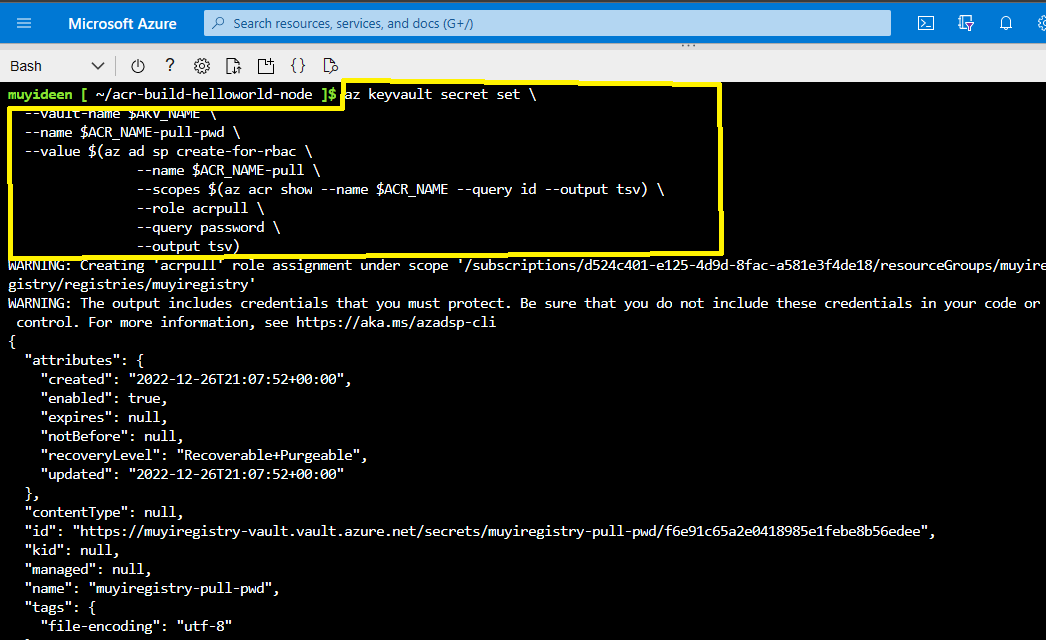
-
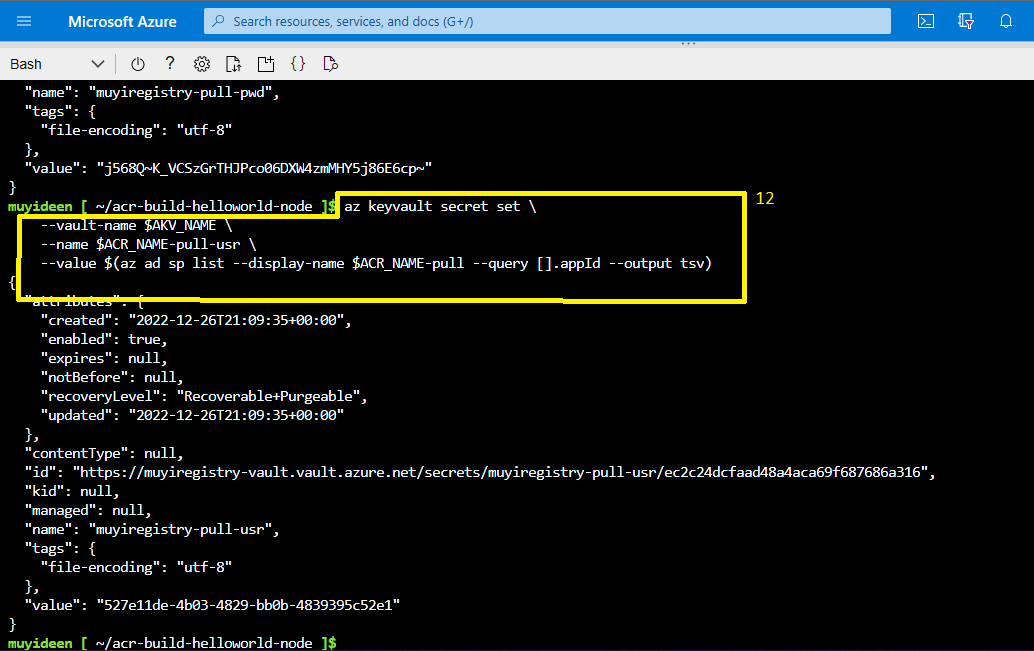
Next, store the service principal’s appId in the vault, which is the username you pass to Azure Container Registry for authentication:
# Store service principal ID in AKV (the registry *username*) az keyvault secret set \ --vault-name $AKV_NAME \ --name $ACR_NAME-pull-usr \ --value $(az ad sp list --display-name $ACR_NAME-pull --query [].appId --output tsv)You’ve created an Azure Key Vault and stored two secrets in it:
-
$ACR_NAME-pull-usr: The service principal ID, for use as the container registry username. -
$ACR_NAME-pull-pwd: The service principal password, for use as the container registry password.
-
-
Execute the following
az container createcommand to deploy a container instance. The command uses the service principal’s credentials stored in Azure Key Vault to authenticate to your container registry.az container create \ --resource-group $RES_GROUP \ --name acr-tasks \ --image $ACR_NAME.azurecr.io/helloacrtasks:v1 \ --registry-login-server $ACR_NAME.azurecr.io \ --registry-username $(az keyvault secret show --vault-name $AKV_NAME --name $ACR_NAME-pull-usr --query value -o tsv) \ --registry-password $(az keyvault secret show --vault-name $AKV_NAME --name $ACR_NAME-pull-pwd --query value -o tsv) \ --dns-name-label acr-tasks-$ACR_NAME \ --query "{FQDN:ipAddress.fqdn}" \ --output tableThe
--dns-name-labelvalue must be unique within Azure, so the preceding command appends the container registry’s name to the container’s DNS name label.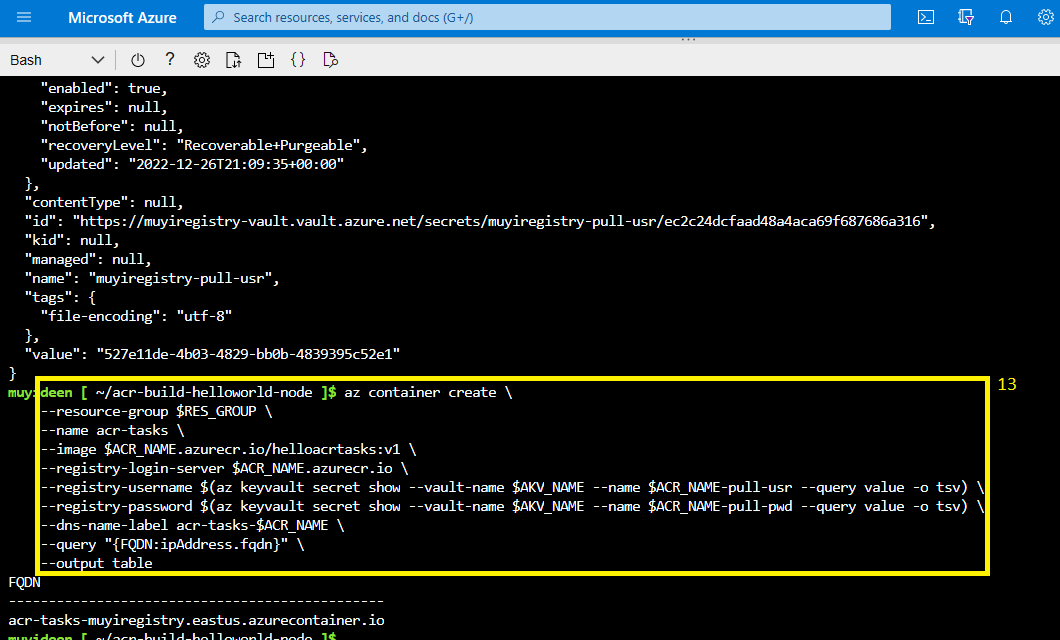
-
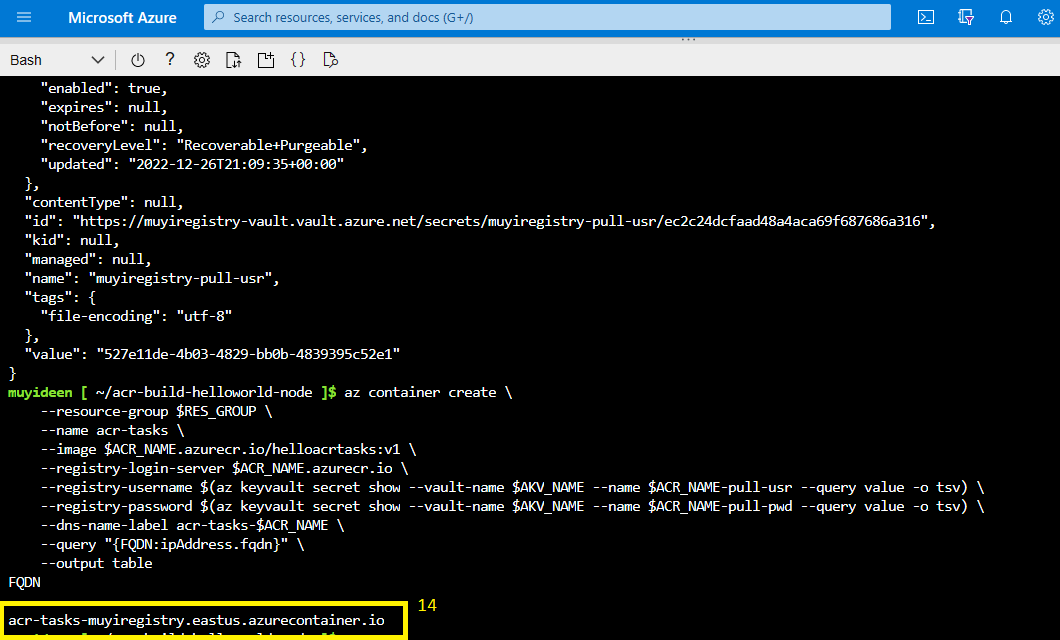
Take note of the FQDN
Verify the deployment#
-
To watch the startup process of the container, use the
az container attachcommandaz container attach --resource-group $RES_GROUP --name acr-tasksThe
az container attachoutput first displays the container’s status as it pulls the image and starts, then binds the local console’s STDOUT and STDERR to that of the container.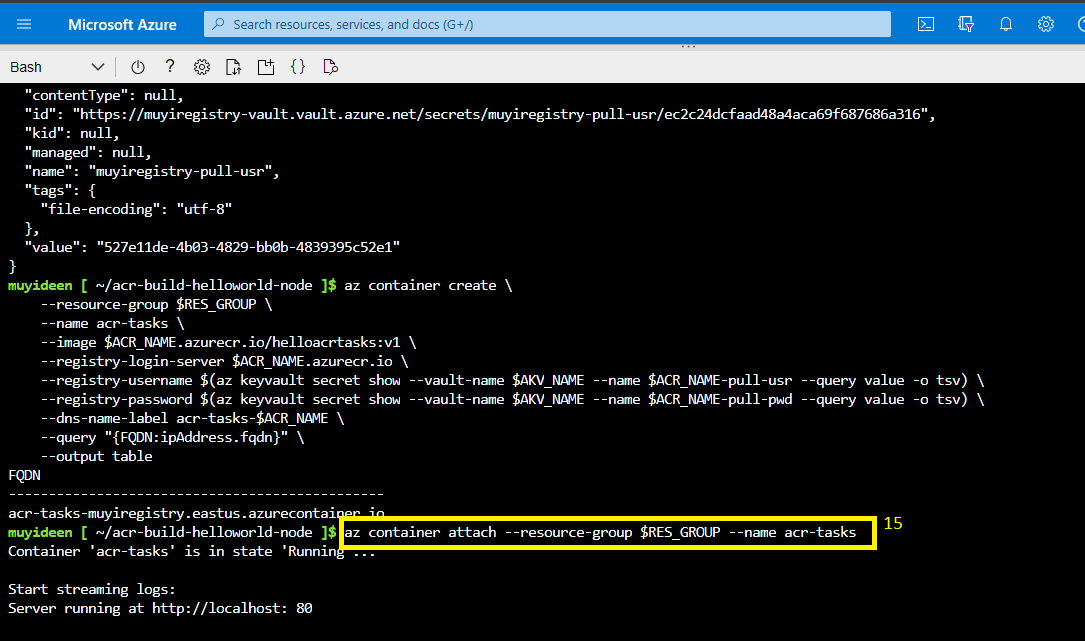
-
When
Server running at http://localhost:80appears, navigate to the container’s FQDN in your browser to see the running application.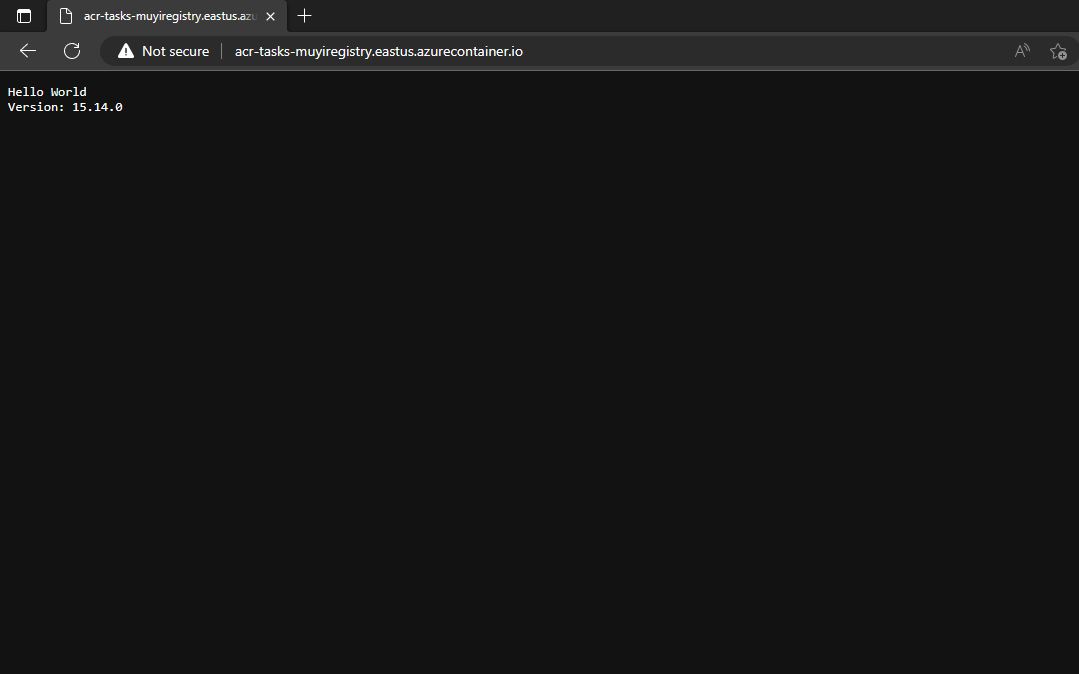
To detach your console from the container, hit
Control+C.Clean up resources#
-
Stop the container instance with the
az container deletecommand:az container delete --resource-group $RES_GROUP --name acr-tasksinput
yto confirm the action from the prompt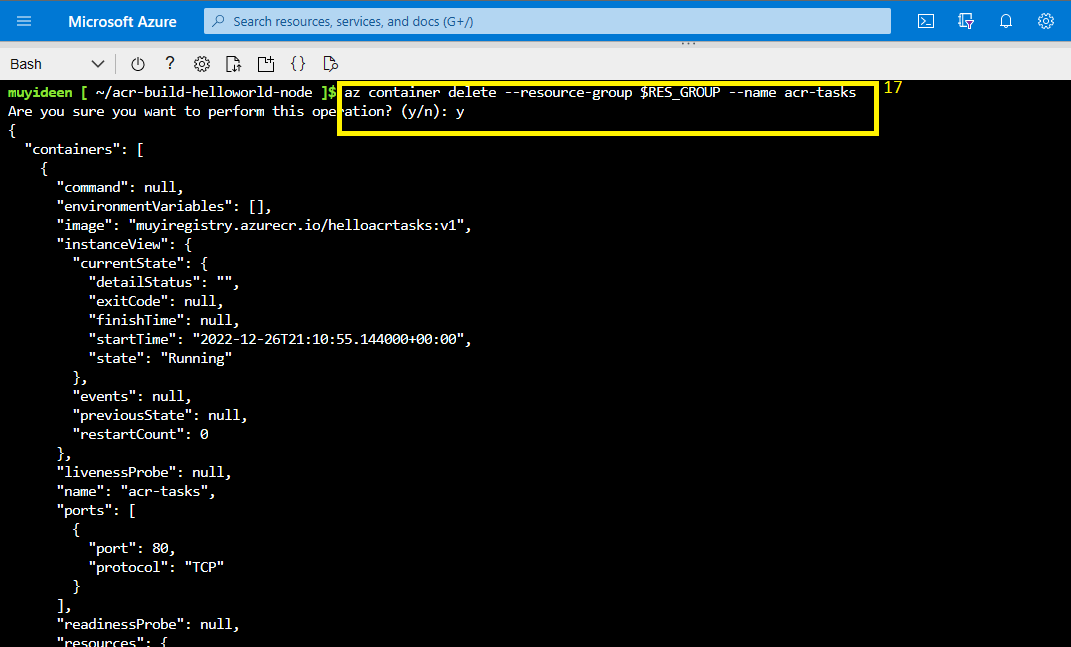
-
To remove all resources you’ve created in this tutorial, including the container registry, key vault, and service principal, issue the following commands.
az group delete --resource-group $RES_GROUP az ad sp delete --id http://$ACR_NAME-pull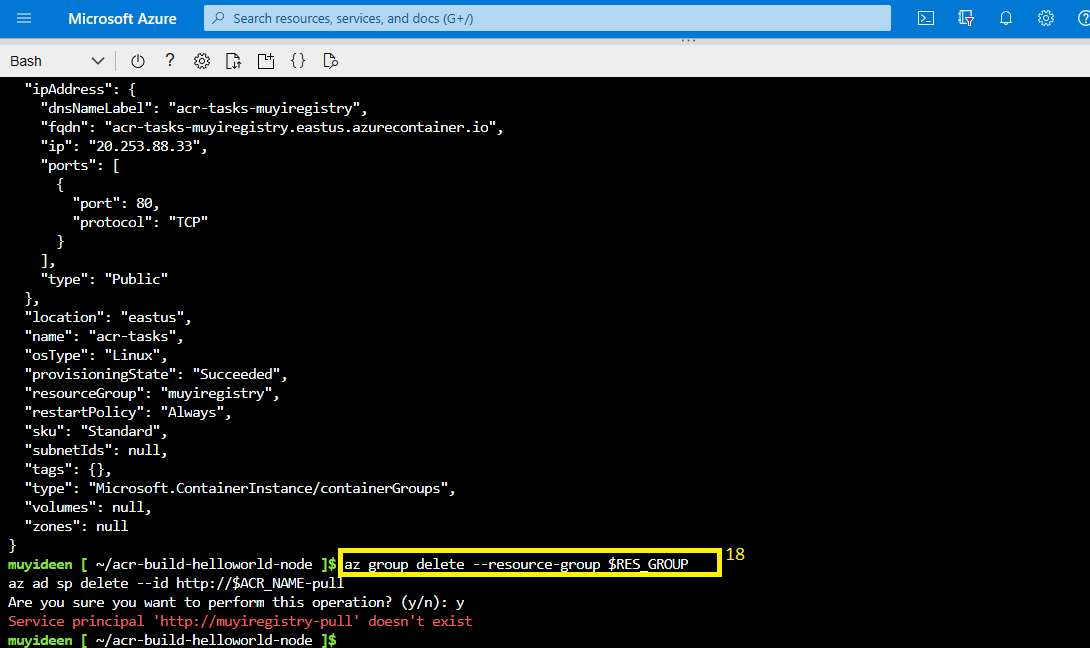
Thank you for reading. connect with me on Linkedin